
|
Breakneck Mountain Ntrak ModuleFrame, Roadbed and Track |
| <-- Intro | Wiring --> |
After a module frame building session on 3/11/2002, finishing up on 3/13/2002 at a fellow club member's home, Here's how I began work after taking my new project home. I placed the track on my lines with mapping pins just to get a visual confirmation and approval of their location. Minimum radius allowed is 24" on the mainline by Ntrak standard. Mine are 24.5" or larger. Next step, jigsaw the river out of the front of the plywood. 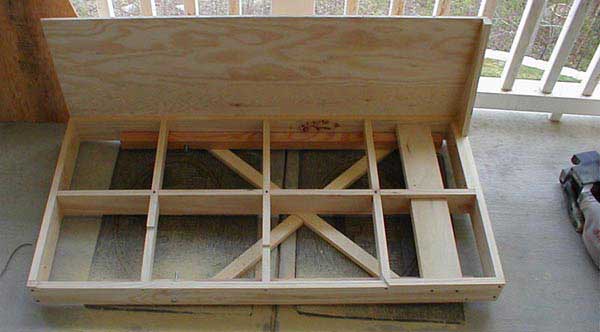 Here you can see where I used my belt sander to take 1/4" out of the framework where the plywood for the river will go. 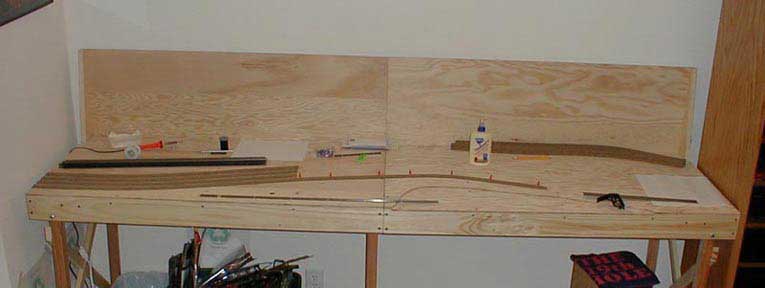 The plywood decks have been glued and screwed and I have begun putting the cork roadbed in place after verifying my Ntrak standard measurements for track centerline placement. From the front: 2.5" Orange; 4" Red; 5.5" Yellow; 7" Blue. 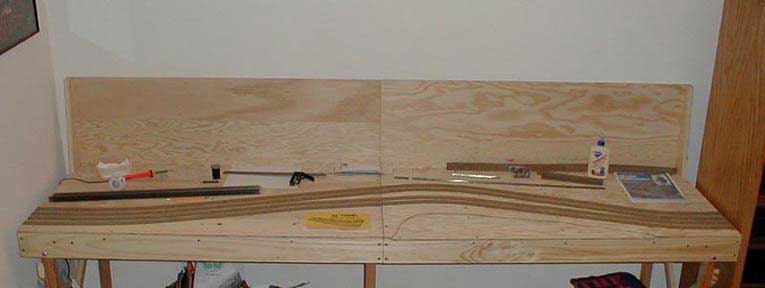 All the cork roadbed is laid for the orange, red, yellow and blue tracks! Yeah! I used wood glue to hold the roadbed in place. 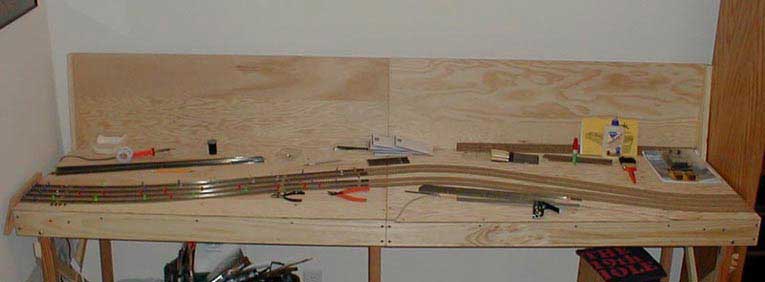 1/2 of the track has been laid! I clamped a board to the left side as recommended and put Atlas 2.5" pieces up against it (held by the blue mapping pins) and began to lay the track. I will be using Krazy glue, about 1 drop every 6-8 ties on each side of the track to hold it in place and soldering the sections of track together when I solder the feeder wires. 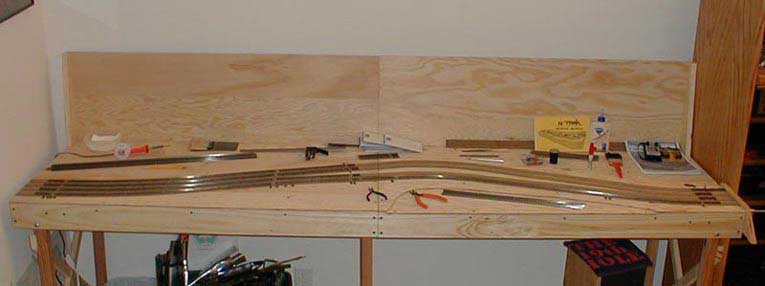 I finished putting Krazy glue on the track on the left side and removed the mapping pins. I then began work on the right side... of all things, I ran out of Krazy glue! 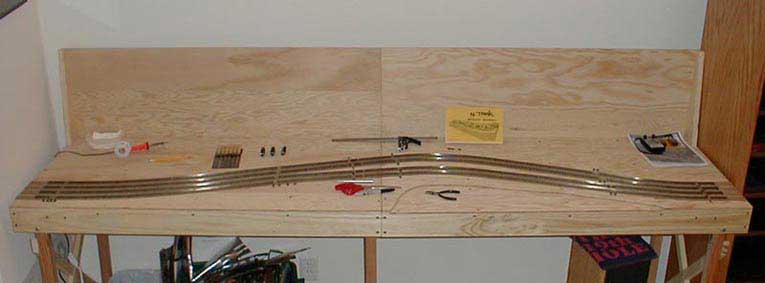 All the track is laid and glued! Next comes the feeder wires and soldering!
|
